You are hereRob's Homemade LEDs - Batteries
Rob's Homemade LEDs - Batteries
The rule of thumb for driving LEDs with the 3021 seems to be: Sum the total voltage drop over LEDs to drive and add 1v for headroom.
NB: in fact any source above 16v (up to 32v) will probably do the job given the specs of the 3021. And if you're willing to spend a little extra and get the 4015 BoostPuck (which is pin compatible and should work with the circuit above) a voltage source less than this will do. Erm... although at the moment these only seem to come in 350mA flavour so you'd be sacrificing a lot of brightness or be looking at LEDs of different specification.
Back to the 3021 then: given we're trying to drive four LEDs here, and that the XR-E data sheet says that at 700mA the voltage drop is 3.75v that makes 16v. I'd already decided the power had to come from a multi-cell NiMH pack - lithium ion packs are nice and light, but also expensive as are their chargers, and also prone to spontaneously combustion if treated badly - not nice in your MTB backpack!
During investigations I discovered that a 1.2v cell can drop to around 1v during use before one should not discharge it further. Given we want 16v, that's a 16 cell pack - easy. Erm... or not, as to find something that can charge 16 cells is nigh on impossible. Another Plan B kicked in - 8 cell packs can be had rather cheaply as they are used in model cars, just grab a couple of them use in series to drive the lights, split and charge in parallel or (as I was advised by the supplier) individually. A quick search on eBay found a few options and the following parts:
Bill of Materials
| What | Source | Cost | |
|---|---|---|---|
| 9.6v NiMH battery (8 cell, 3300mAh) x 2 | Newtons of Sale | $74.00 | |
| 9.6v NiMH charger | Newtons of Sale | $35.00 | |
| Total | $109.00 |
Finishing Touches
The job might be pretty much done, but there are still a couple of things to finish up:
As it stands, trying to strap something made from plastic and aluminium to the top of a helmet probably isn't going to be very successful, and is also probably going to damage said helmet.
Luckily a mate handed over the end of a roll of this self adhesive foam stuff. The roll (50mm) is the almost exact same width as the component box from Jaycar (53mm) so no trimming along the length is required. Cut a couple of pieces and stick them on for a surface with more grip and a less damaging finish.
Onto the final stretch now - away we go with a few irreversible (well, not easily changed anyhow) steps.
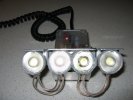
After making pretty sure we're happy with the choice of diffusers begin to seal the lenses into tubes. In the background you can see the power cable has been switched for a final curly one picked up from Jaycar - this has also had sealant applied.
This is a bit warts and all - see the extra two holes on the third (from left) tube? Don't worry - once sealed no-one will know.
The sealing looks a bit rough but again don't worry, this stuff can be trimmed when dry with a sharp knife.
After the sealant is applied and dried we're pretty much done.
It's still looking a little rough. Although the rough edges could be trimmed perhaps doing so would reduce the effectiveness of the seal so it will probably stay looking like this.
Will probably use another strap (two in total) for real. Might also pad some more under the back of the control unit.
As you can see, the control unit is quiet slim and fits really nicely this way round. Thanks to Stuart for his suggestions here, originally it was going to sit across the helmet.
Bill of Materials
| What | Source | Cost | |
|---|---|---|---|
| Hook & Eye fixing (Velcro) x 2m | $2 shop | $2.85 | |
| Sellys Roof & Gutter (transparent) | Bunnings | $5 (approx) | |
| Sticky Foam Stuff | Greg | Free | Apparantly this stuff is used in the A/C game and can be had from HeatCraft in Artarmon. |
| Curly Power Cable x 2m | Jaycar | $4.95 | Actually a car power extender, but remove the ends. |
| Total | $12.80 |
- Login to post comments


