You are hereRob's Homemade LEDs - Hardware
Rob's Homemade LEDs - Hardware
It had always been a plan to mount the LEDs and optics inside Berocca tubes. Initially the thought was that the tubes could be kept separate and be fixed at various locations on the helmet. Cool as this sounds after a bit of thinking it was never going to work, and so decided it would be best to bolt LEDs on MCPCB through the bottom of the tubes and into something more solid. Aluminium angle seemed like a good choice and was freely available in various sizes - a number of designs emerged...
To overcome the difficulties in the first design (where the bracket holding the LED tubes is wider than the control box) this appeared.
Bolt LEDs to Berocca tubes (hence the green) and then into 20x20x1.5mm aluminium angle. The bottom part (with three tubes) is then fixed and hinged to the transparent box behind (83x54x30mm) which holds the control electronics.
The fourth and final LED is fixed atop the first bracket. Not sure I like this really as it's looking a bit vulnerable to impacts with tree branches.
This is Stuart's take on how things should be. He thought a 2x2 stack of lights would be better than the spread out designs I'd been talking about.
This design didn't fly because I thought it would be too high and looking back on things, would have been very tricky to mount heat sinks too.
Although on the other hand, if you could find a nice square heat sink that the tubes could have been bolted directly too this would have been a good plan.
This was the fourth idea idea I came up with. It's a hybrid between Stuart's 2x2 and the others I guess.
Am liking it a lot because the end two LEDs can be adjusted independently of each other and the middle two (which are fixed together, but that's good).
The LEDs are bolted to Berocca tubes (hence the green) and then into 20x20x1.5mm aluminium angle. For the middle two they are then fixed and hinged to the transparent box behind (83x54x30mm) which holds the control electronics. The end two are hinged through the same centre of rotation but can be moved separately. You could even bend the aluminium angle a little for these end two, so as to change their direction horizontally.
Berocca Tubes
You'll need one tube per LED. It might be fun to keep the iconic green colour and a bit of the logo (nice talking point) but sadly all there is down the end of the tube we'll be using is the bar code, so let's strip that paint. Get to it with some P280 (or more coarse if you're lazy, or less if you're mad!) wet & dry paper - a single 8x8cm patch seems good for at least a couple of tubes. It doesn't seem quiet right to tell anyone how to do this, but up/down seems good for a while, while you seem to need some rotating action to finish off ;) Phew - about 15 mins a tube later, viola!
Aluminum Angle
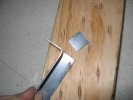
To provide a strong and stable platform for fixing the Berocca tubes, and to provide a greater heat sink area in order to run the LEDs nice and cool(ish) mounting them to aluminium angle seemed a good plan. See below, but it's pretty obvious: Take some angle, chop to length, cut down the inside angle on one side, then chop across that to remove a square/oblong piece and finally bend what is left at right angles. What I did find is that you need to leave maybe 1-2mm per bend. Ie. to make the part holding the centre two LEDs I took a 100mm piece of angle and cut down leaving 56mm in the centre, which when bent to form the 'arms' puts them 58mm apart.
Cooling
Ah, did I say using aluminium angle should provide an area large enough to act as a heat sink? After a quick initial test this didn't seem to be the case. Running just one LED on the middle pair resulted in the middle piece of angle getting up to around 64° C (ambient late 20s) so this was no good.
To overcome this a handful of sinks designed specifically for high power LEDs was bolted to the back of the angle, although even with all these (see below) the entire assembly would still get to high 50s when all four LEDs are run at full power for a long period.
Various Fixings
Dunno about any MCPCBs that you might be able to get now, but ones I had came with 2mm holes for bolting to something. Not the sort of thing your local hardware store stocks. Jaycar have 2mm screws, but no nuts - not very useful. A few calls around here revealed a couple of sources (try hobby/model shops) and I ended up getting a handful of 2x10mm screws (with bolts!) from Coventry Fasteners.
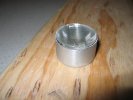
Berocca tubes scrub up nicely (with P280 wet and dry)... astute readers will notice this is Indonesian Berocca 
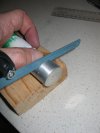
Initially I thought using a Dremel (rotary tool) with disc cutting wheel would be a good idea, but no - stick with the hacksaw here (using finest blade you can find).
Don't press too hard - the tubes are quiet thin and bend easily.
A single lens in Berocca tube (with 8x25 degree diffuser that we won't be using) - fits perfectly.
Note the gap around the edge where we'll be sealing the lens in later.
Use the MCPCB as a guide and drill a couple of holes in the bottom of the Berocca tube. These have to be really very accurate - the lens won't fit if it's more than probably half a millimetre out.
The bolts (screws) here are 2mm and as you can see, there's hardly any clearance, but just enough, between their heads and the LED contacts.
I had a couple of accidents trying to bolt through the aluminum where the holes behind were not perfectly aligned. That meant the screw heads were not perfectly flat on the MCPCB and cut into it causing a short. Very bad, but if this happens repair it with nail varnish.
Make the back plate for the middle two lights... starting with 100mm of angle measure and cut 20mm into both ends.
After cutting down the corner of the angle, make another cut on the correct side (that's not the side cut first off) and bend back what's left at 90 degrees.
Repeat at the other end. Then, make another one and cut it down the centre so each half becomes the back plate for the end LEDs.
Make sure the part you just made fits the electronics enclosure - using spare aluminum as spacers (the uprights will fit here).
While doing all this, try not to chop up thumbnails like some 
Measure, cut and bend some more angle for the uprights. I used a bit of clear plastic (top of a yoghurt pot) as a template for where to drill holes for the hinge.
Make sure it's all fitting nicely... Can you tell what it is yet? 
These L2 Optics, although made for Cree LEDs don't account for any connections made atop the MCPCB the Crees I bought came mounted on.
Not that big a deal - get the Dremel (or knock of rotary tool) out and mill the bottom a bit. The adhesive that's fitted bottom of these does nothing but get in the way of that process though - so chop out where you'll be milling first.
Oh - stuff something (tissue here) in where the LED goes - don't want hot plastic shavings getting in there.
An L2 Optics lens after a bit of milling - fits the MCPCB a treat now.
Ah - because of the way the middle two LEDs connect one of the remaining corners will also be removed for each of the centre lenses.
Drill and mount Berocca tubes with Lenses to backplate. Round off the aluminum corners a bit too.
These sinks came with self adhesive tape, but bugger that - we're using bolts so drill some holes.
Apply some thermal grease and fix the heat sinks. It's dirty stuff and will squeeze out of the sides of the joins so don't over do it.
Everything bolted up - there are LEDs inside each of these tubes although you see the left one is the only one with a wire at this point.
The wider hole on the right isn't an accident - the middle two tubes have a single wire entering/leaving the bottom of each (they have a wire between them at the other side - out of shot), whereas the end two need room for two wires in and out the same hole.
Bill of Materials
| What | Source | Cost | |
|---|---|---|---|
| Aluminium Angle (20x20x2000mm) | North Sydney Hardware | $10.20 | Bunnings do sell this, but in 3m lengths for $14.50 or something. |
| 2mm screws and nuts | Coventry Fasteners | $10 or free | There's a $10 minimum spend here, these are essentially free if you can pick something else up here. |
| Berocca Tubes x 4 | Kitchen bin | Free | Well - free if you drink a lot of this anyhow. |
| Jiffy box - Clear (53x84x30mm) | Jaycar | $2.95 | |
| Nylon screws (12x3mm) pk 10 | Jaycar | $2.65 | |
| Nylon nuts (3mm) pk 10 | Jaycar | $2.50 | |
| Total | $18.30 |
- Login to post comments
