You are here
nobmob.com

Technical GNR
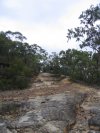
There's a few rocky sections like this here - brilliant stuff.
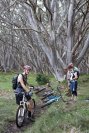
If you can just see there, Whisperer has made the lot as the other guys applaud his efforts.
Western Commission Junction

The sign says 'Old Great North Rd' to right, 'Western Commission Track' to left.
Right is the go - it's rather single trail like in there (well - sections are) with many technical challenges.
Severe Bends?

The sign says, "Severe Bends" and is posting a 40Km/h limit. No worries on the way up, but one wonders if the limit applies to bikes on the descent... oops 
Simpsons Track Junction
This is looking East - the sign says Simpsons Track is right, Old Great North Road (to Clare's Bridge) is left. Yeah - there's that naming discrepancy - it's called Great Northern Road on the topo map - oh, and our site
Although the Simpsons Track is marked as a walking trail on the topo map it's far from that. Given the twin ruts through the grass it's clear vehicles are a regular occurrence here so take a ride. Plus, there's no signs saying you can't.
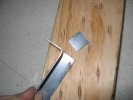
Check Fitting

Make sure it's all fitting nicely... Can you tell what it is yet?
Measure Uprights

Measure, cut and bend some more angle for the uprights. I used a bit of clear plastic (top of a yoghurt pot) as a template for where to drill holes for the hinge.
Mount Lens Tubes

Drill and mount Berocca tubes with Lenses to backplate. Round off the aluminum corners a bit too.
Check Fitting

Make sure the part you just made fits the electronics enclosure - using spare aluminum as spacers (the uprights will fit here).
While doing all this, try not to chop up thumbnails like some
Bend Angle
After cutting down the corner of the angle, make another cut on the correct side (that's not the side cut first off) and bend back what's left at 90 degrees.
Repeat at the other end. Then, make another one and cut it down the centre so each half becomes the back plate for the end LEDs.
Measure and Cut Angle

Make the back plate for the middle two lights... starting with 100mm of angle measure and cut 20mm into both ends.